


by Dr. Brooks Haney, on 7/31/19 2:22 PM
Chief Complaint: Canine that is stubborn to move.
Some teeth can be slow or difficult to move with the wire alone.
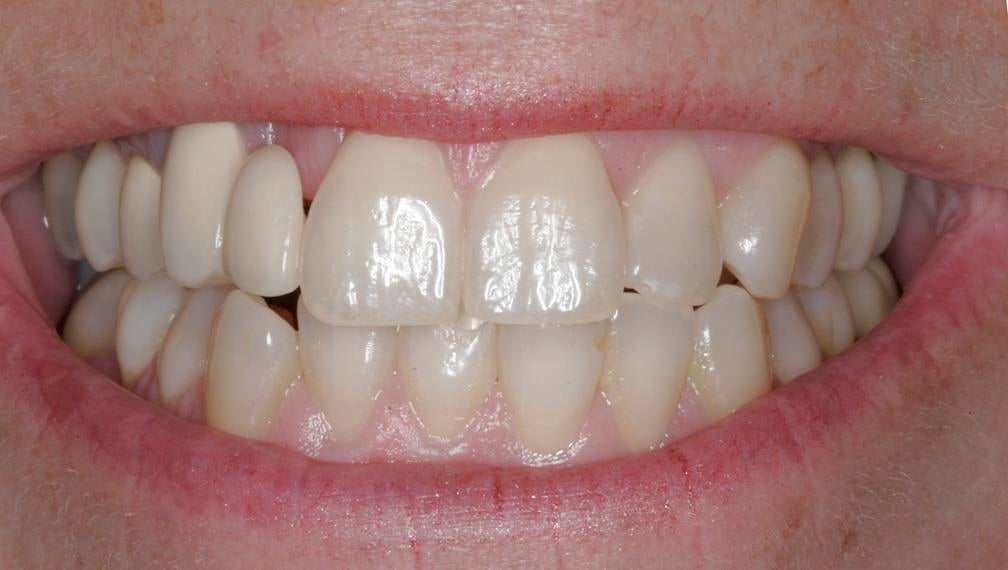 Figure 1: Pre-treatment photo of the problem.
The LR3 (#27) was crowded out facially along with some other mild lower crowding., The patient was missing the UR2 (#7) congenitally and her periodontist wanted to place an implant in the position of #7 to replace an old cantilevered bridge that had been in place from the UR3 (#6) to #7. The periodontist did not want to “lose” the patient for a significant amount of time due to orthodontic movement so the patient was referred for treatment by short term orthodontic techniques (Six Month Smiles).
.jpg?width=576&name=Powerchain%20Slingshot%20Blog%20(2).jpg)
Figure 2: Patient was referred by a periodontist that planned an implant in the UR2 (#7) position but the LR3 (#27) was displaced so far facially that the occlusion for #7 could not be planned correctly.
Steps to Address Complaint: Use the “Powerchain Slingshot” to move a canine into the arch so that the occlusal relationship would be correct for a future upper implant supported crown.
The Power Chain Slingshot technique requires that the adjacent teeth are long tied to create anchorage. By long tying the teeth distal to and mesial to the lower canine it creates a stabilized (anchored) section of teeth that are resistant enough not to allow the long canine root to overpower them. This also minimizes the potential for unwanted changes to the adjacent teeth #26 and #28. In this way the force to move #27 has almost all of its effect on the canine and not the other teeth.
.jpg?width=889&name=Powerchain%20Slingshot%20Blog%20(3).jpg)
Figure 3: Lingual buttons were placed on teeth #28 and #26.
After the other crowding had been corrected and the long ties were in place we attached the lingual buttons to the adjacent teeth #28 and #26. At the point we used continuous power chain (PC) and attached it to the button on #28 and stretched it out over the facial bracket on #27 and then back to the lingual button on #26. This creates a “slingshot” effect in the way it appears in the image below. Of course we provided IPR as needed. The length of the power chain can vary – the important part is that there is pressure towards the lingual on the lower canine.
.jpg?width=474&name=Powerchain%20Slingshot%20Blog%20(4).jpg)
Figure 4: Using the lingual buttons, continuous powerchain, and long ties to create a "slingshot" effect.
Result: The patient was thrilled that we were able to correct the problem in about 4 months. The periodontist was surprised at how quickly we corrected the problem using Six Month Smiles.
WORD OF CAUTION: This technique can be reversed to tip a tooth more facially but the same precautions must be followed.
The Powerchain Slingshot is not to be used in every situation. If the provider does not carefully long tie the adjacent teeth to create a strong bridge or anchor, then there is great potential for unwanted movement. Management of the adjacent teeth is vital. Also, this movement is fairly rapid and changes can occur very quickly, often within 24 hours. This is often dependent on the month of treatment and/or the mobility of the teeth.
Other Options to Consider: P.O.P. bends or composite bumps. The .016 wire is the wire size used most often as it is less rigid than .018.