How To Take Great Dental Impressions
by Esther Adame, on 10/25/17 9:27 AM
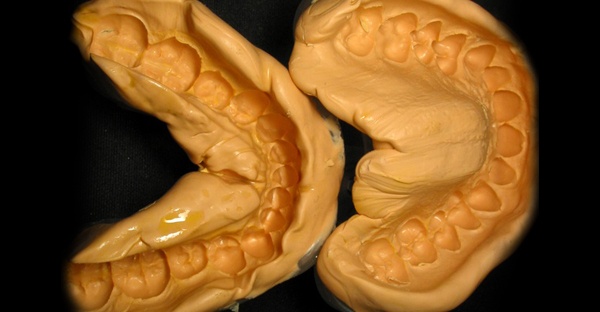
*Example of High Quality Impressions.
Great impressions ensure well-fitting bonding trays. Please feel free to share the steps and video below with your team to help ensure your cases are completed with excellence. Six Month Smiles requires PVS (Poly-Vinyl Siloxane) impressions with your cases to facilitate easier re-pouring if necessary. (Or, we also now accept digital impressions!)
Please make sure to check your impressions closely before sending them to Six Month Smiles, as any issues can hinder the timely completion of your case. A good impression should have clear facial surface of the teeth/margins, no voids, no pulls or see through of tray.
- Select the best fitting tray, this can help to ensure clear margins.
- Try the tray in the mouth before taking the impression.
- Stand in front of the patient when trying on the trays.
- Make sure the lip fits over the anterior edge of the tray.
- When the tray is in the mouth, wiggle it around:
- If it wiggles, there is room for the PVS material.
- If it does not wiggle, it will not have room for the PVS material.
- If tray is too tight or small, the impression will have voids and a tight compression of the tissue that will show on the impression and pour up.
- Load the impression and center the tray in the mouth.
- When taking the impression:
- Upper Arch - stand behind the patient.
- Lower Arch- stand in front of the patient.
- In one fluid motion push the tray:
- Upper Arch- lightly push up into the teeth using index and middle fingers, putting equal force on right and left side from back to front.
- Lower Arch- put in the tray and have the patient lift the tongue and then lightly push down into the teeth from back to front, using index and middle fingers putting equal force on the right and left side.
- Fully insert tray into the mouth past the gum line, to capture gingiva margins.
- Roll the lip over the tray.
- Line the tray with the midline or nose of the patient, using the handle of the tray as the guide.
- Don’t let the tray touch the teeth or push too hard:
- If the tray touches the teeth, you will see the tray through the impression and once poured up the incisal edge of the teeth on the model will be distorted.
- DO NOT have the patient bite down.
- Hold the impression tray completely stable until the material is set.
- DO NOT move the tray, while the material is setting up, this can cause the material to smear or have bubbles.
- Remove the impression.
- Upper Arch- pull straight down.
- Lower Arch- pull straight up.
- If needed, gently rock the tray side to side to loosen up the tray.
- If the impression gets locked, have patient close the lips and blow.
With a good impression, we can help you provide the best quality care for your patients.
Tips:
If you have a patient with gagging issues, choose one of the following:
- Put salt under the tongue.
- Use N20.
- Raise feet off the chair.
- Have patient put their finger in the middle of the tongue.
- Tilt head forward.
If using plastic disposable trays and it needs to be widened:
- Use a small gas flame torch, for 5 seconds run the tray over the flame – and use a guaze to widen the tray.
- Make sure to cool off the tray before putting it back in the mouth.
If a tray needs to extend distally:
- Build up with dental rope wax on the end of the tray.
- Stand upright with shoulders relaxed and elbows down.
- Tell the patient to relax when taking the impression.
- Be relaxed when taking the impression.
- The patient should feel the relaxed effort when taking the impression and they will also relax.
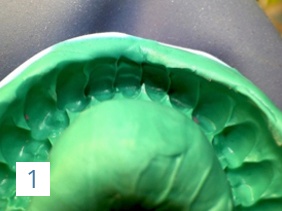
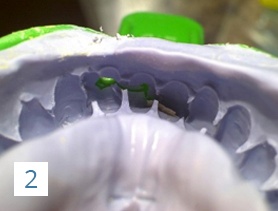
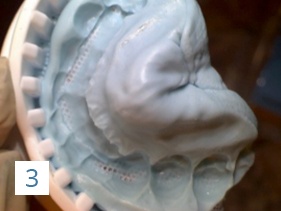
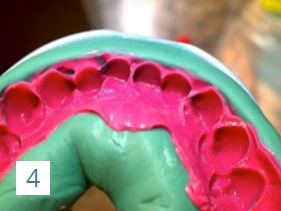
Examples of Imperfections:
- Pulls, No Clear Gingival Margins.
- Blow Outs.
- Not Enough PVS / No Tooth Definition.
- Short Margins.
About the Author:

Esther Adame is a dental professional who has been doing Orthodontics for the past 15 years. Esther became a “Six Month Smiler” in 2008 when she attended one of our very first Level 1 lectures. For the past 12 years, Esther has worked in a Irving, TX based dental practice where she worked with a Six Month Smiles Top Provider and assisted with over 500 Six Month Smiles cases. Esther was also a member of the Six Month Smiles Seminar Team, where she helped train and assist over 2,000 Providers. In September 2017, Esther decided to hang up her scrubs and join the Six Month Smiles Team, as a Sr. Customer Experience Specialist, where she is eager to share her passion for Orthodontics with fellow “Smilers.” Esther is also a native Spanish speaker.
The Six Month Smiles® Short Term Ortho System provides you, the General Dentist with a practical and turnkey solution for adults with crooked teeth. Utilizing unique clear brackets and tooth colored wires, the system allows GPs to easily help their adult patients who think that they are "stuck" if they refuse traditional orthodontic treatment.


