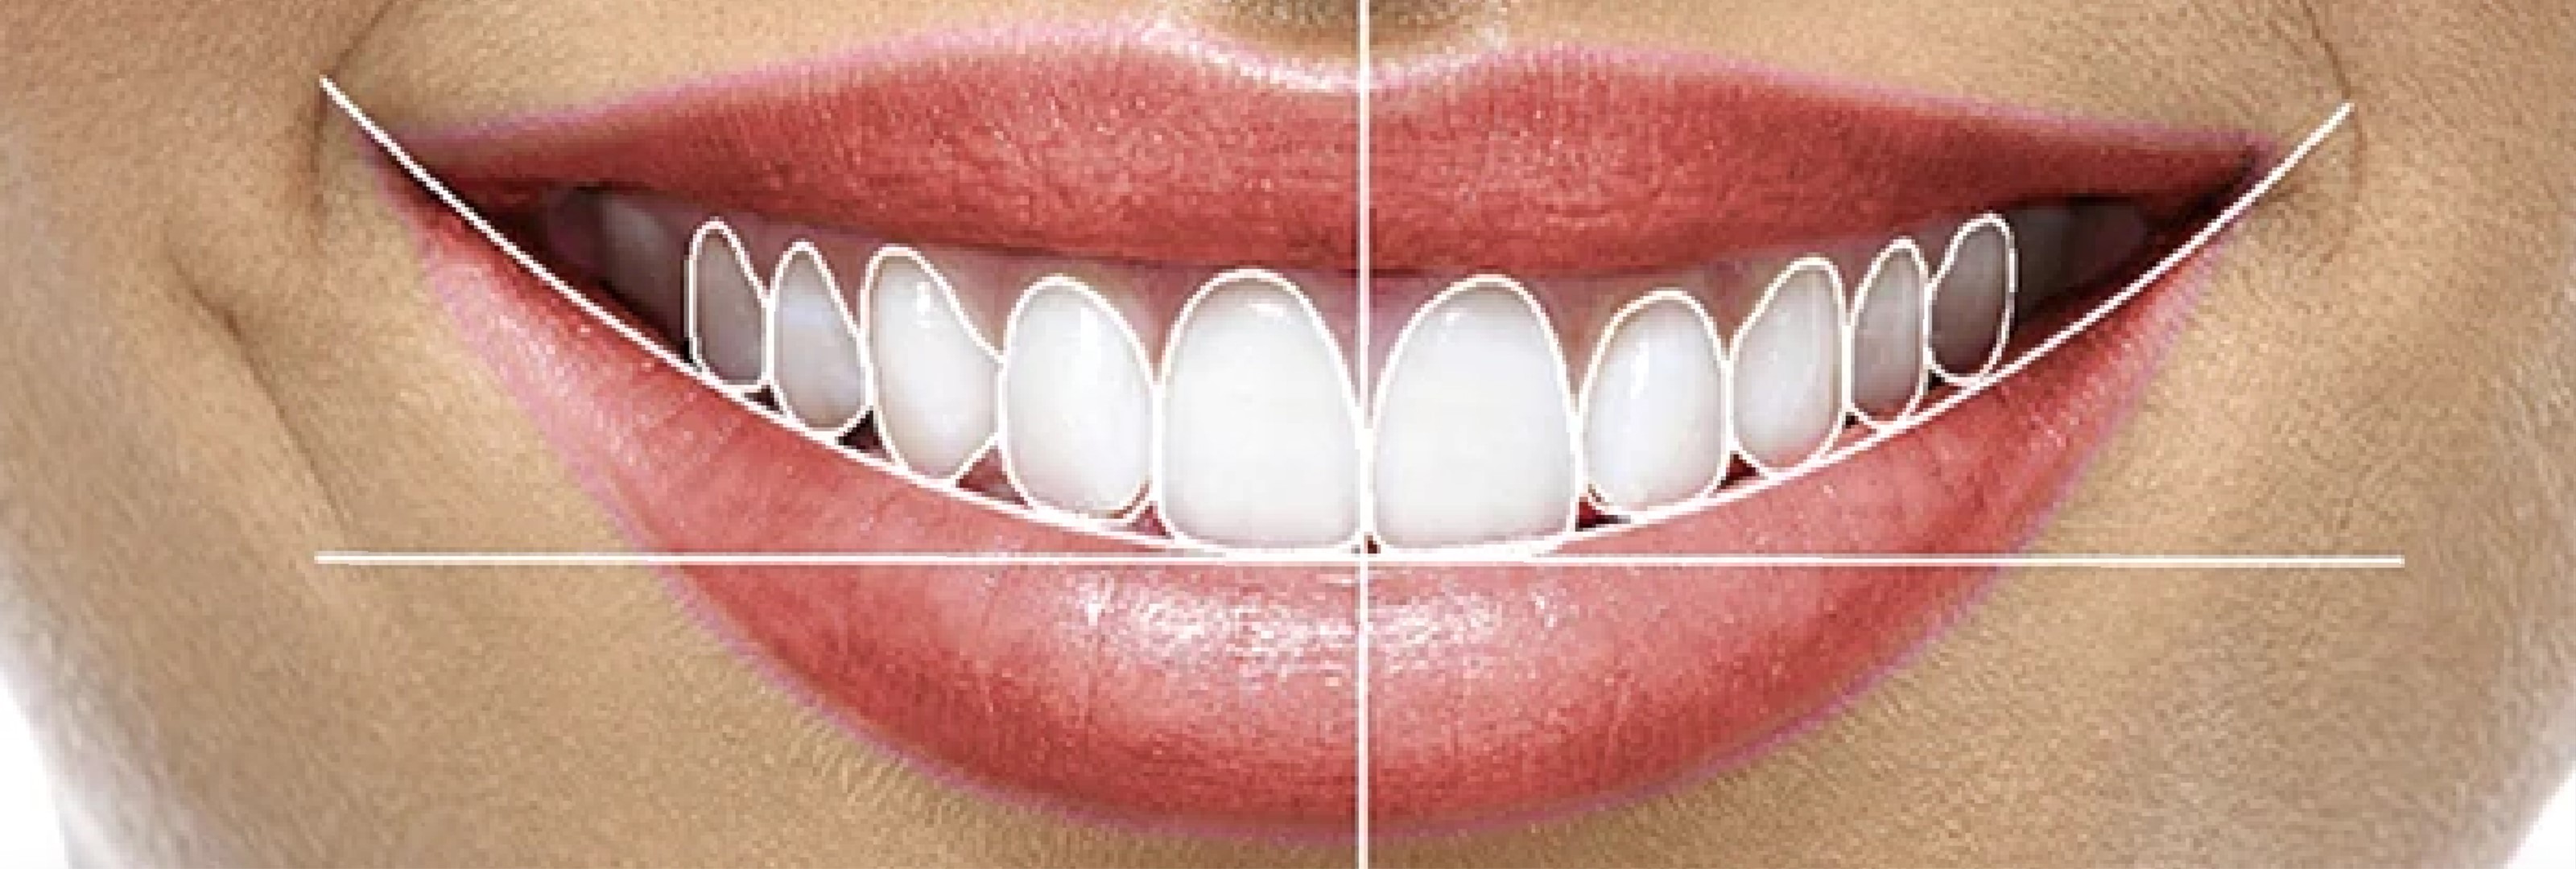
Lammina is an aesthetic treatment and it’s important to identify facial and dental landmarks to design the perfect smile for your patient. Photos are the guide to smile design and give correct direction to many aspects of the digital set up.
- Facial symmetry and canting
- Shape, color, and texture of teeth
- Occlusion
- Recession and gum health
- Crown, bridges, missing teeth, etc.
With proper photos, we can perform a thorough intra-oral and extra-oral assessment
Extra-oral assessment evaluates the patient’s skeletal class (class 1, class 2, class 3), the transverse & vertical relationship (symmetry of the face), and the soft tissue (nasolabial angle and lip competency). This assessment is important because it helps identify the potential factors that can impact the durability and effectiveness of a dental crown. Such an assessment can also help determine if Lammina is a suitable treatment option, either alone or in combination with other treatments, before considering Lammina.
Photos required for proper extra-oral assessment:

Figure 1: facial frontal smile
Figure 2: frontal smile with retractors
Figure 3: facial frontal rest
Figure 4: facial profile (right-side required, left-side preferred)
When taking the extraoral photos, be sure to capture the patient’s entire face and a few inches below the shoulder. Ask your patient to stand straight and do not tilt their head. If your patient is wearing earrings or glasses, ask them to remove these for the photo. Also, long hair should be tucked behind their ears, as the location of the ears is a landmark used during the assessment.
Intra-oral assessment evaluates the patient’s anterior and canine guidance, bite malocclusions (class I, class II, class III), dental centerlines in relationship to the facial midline, spacing and crowding of teeth, tooth proportions and shade, gingival and incisal levels, and periodontal conditions. These elements are important to customize a proper fit, esthetics and function of future restorations.
Photos required for proper intra-oral assessment:

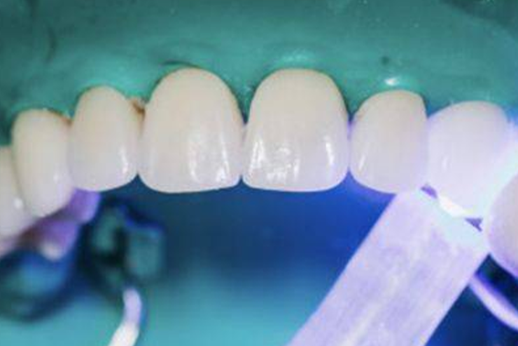
Figure 5: upper occlusal
Figure 6: lower occlusal
Figure 7: right lateral (with bite closed)
Figure 8: left lateral (with bite closed)
Figure 9: frontal with bite closed
Figure 10: frontal with bite slightly open
When taking intra-oral photos, be sure to use cheek retractors and occlusal mirrors. Tip: you can heat the mirrors to avoid fogging once placed in the patient’s mouth. Lighting is important to clearly see all the teeth and gingival margins. Ensure there aren’t any shadows or dark areas (usually in the posterior segment) making it difficult to see the dental definition. Also, if you are using a camera with flash, be careful not to overexpose the photos as whiteout from flash can obscure important areas of the photo.
Smile Design & Treatment Planning
After performing an assessment of the patient, we can begin to digitally design the patient’s perfect smile taking into account other treatments that may be needed prior to Lammina veneers. For instance, we may recommend your patient undergo orthodontics to align the teeth and reduce any flaring prior to bonding veneers. Another example, if your patient has a gummy smile, veneers only may not give them the smile they desire and thus we would recommend gingivectomy prior to bonding veneers.
The goal of the assessment is to determine the most effective treatment options for your patients based on their medical condition and needs, while also considering their overall well-being and quality of life. It is all about determining treatment priorities and identifying treatment options for your patients.
IMPORTANT NOTICE ABOUT CASE SUBMISSION:
When submitting your case, if you do not provide all 10 required photos, the case will be placed on hold until all photos have been uploaded. This may require your patient to come back to the clinic for additional photos, which is not a good use of your time or theirs. To avoid delays with your case, be sure to capture all the required photos and ensure quality is good before submitting your Lammina case to Six Month Smiles.